Carrots: Spicy Pickles, Pesto, and More

Carrots test our patience as gardeners. Their germination time is long, and weeding them is a pain! I can never tell what’s a carrot and what’s a weed at the start of the season. But then, the parsley-like leaves begin to develop, and these sweet, orange Popsicle-like roots take form under ground. Once the foliage begins to identify itself, I feel I’m golden. All I have to do is wait a good 2-3 months, and soon, I am digging up loads of carrots.

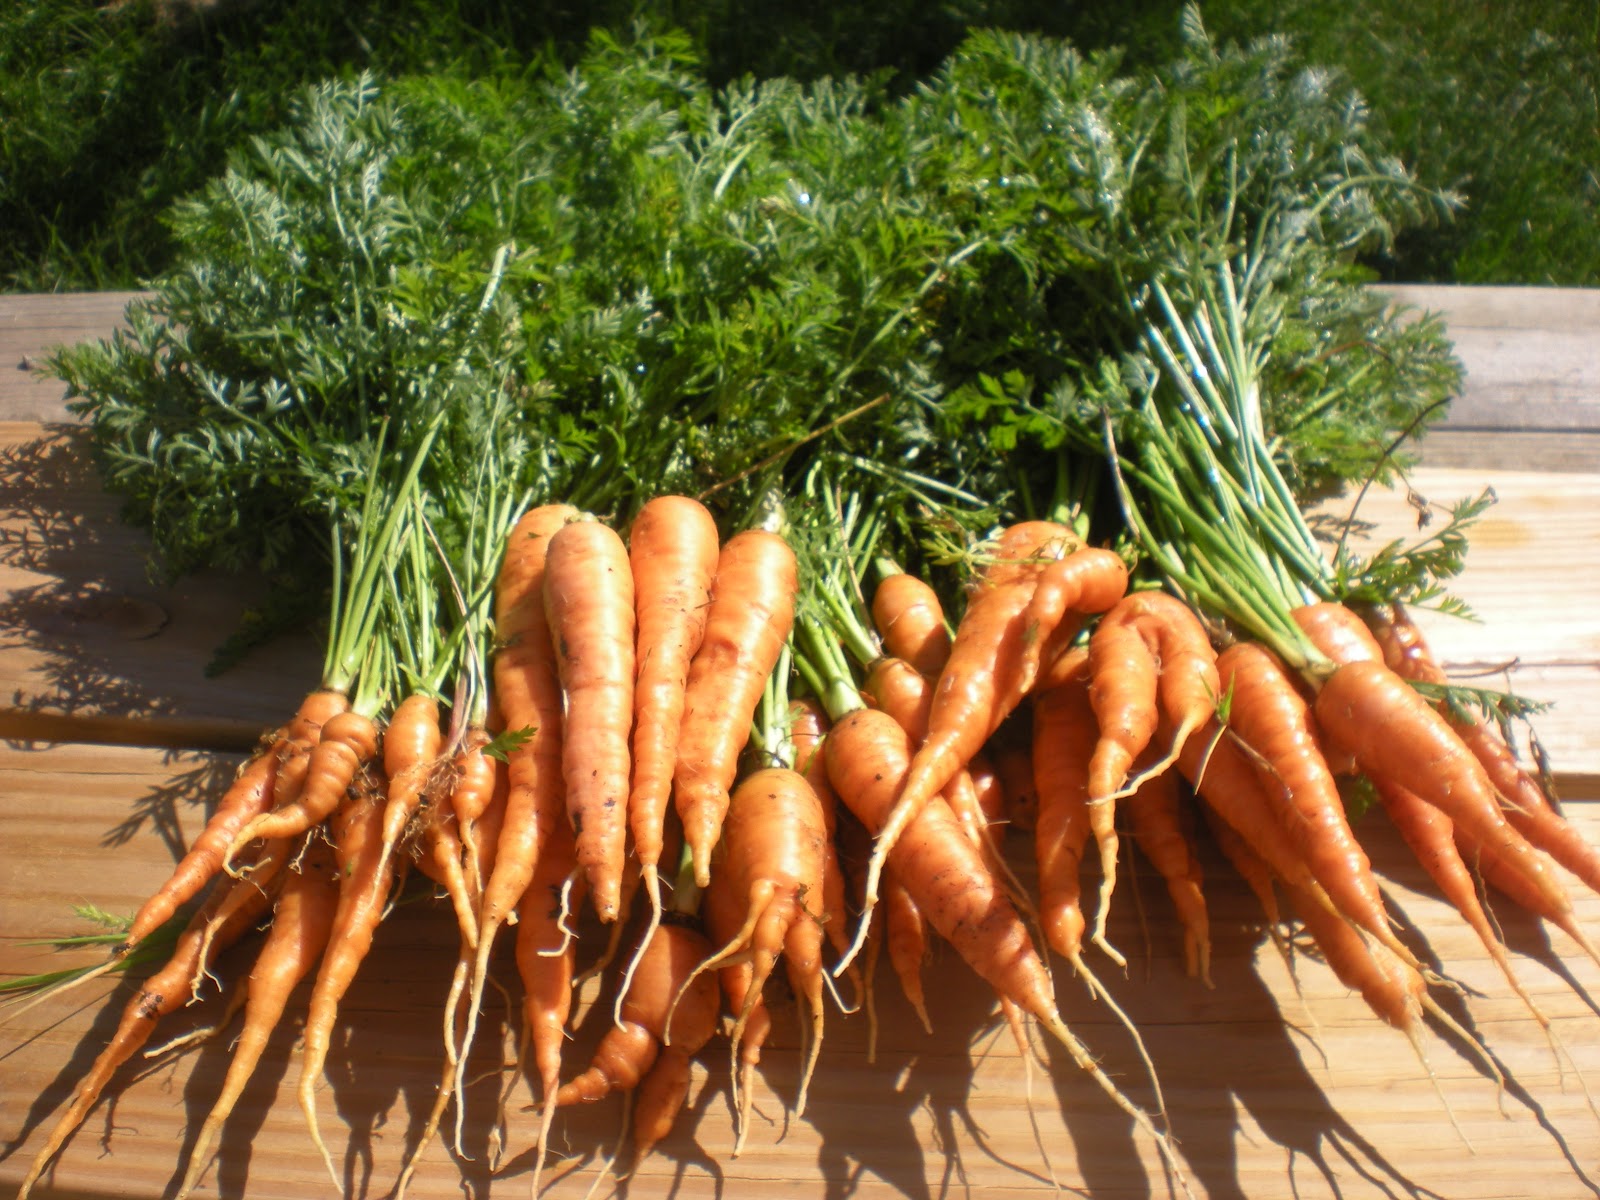
This year, we had our first successful crop of Danvers Carrots. We planted them in a raised bed which helped tremendously in terms of weed control. To get them out of the ground without breaking them, we saturated the dirt around them with water and pried them up with a shovel.  We harvested about 5 lbs. Then, the question was: what should we do with all of them? We also had another pound from my parents’ and our CSA boxes.

We thought about juicing them…but then realized how quickly said juice would be consumed in comparison to the amount of patience exuded to grow and harvest them. We thought about pickling them all, but realized we still had 1.5 jars from last year’s canning season. So, we decided to pickle most and freeze some. We also used the greens to make carrot-top pesto.

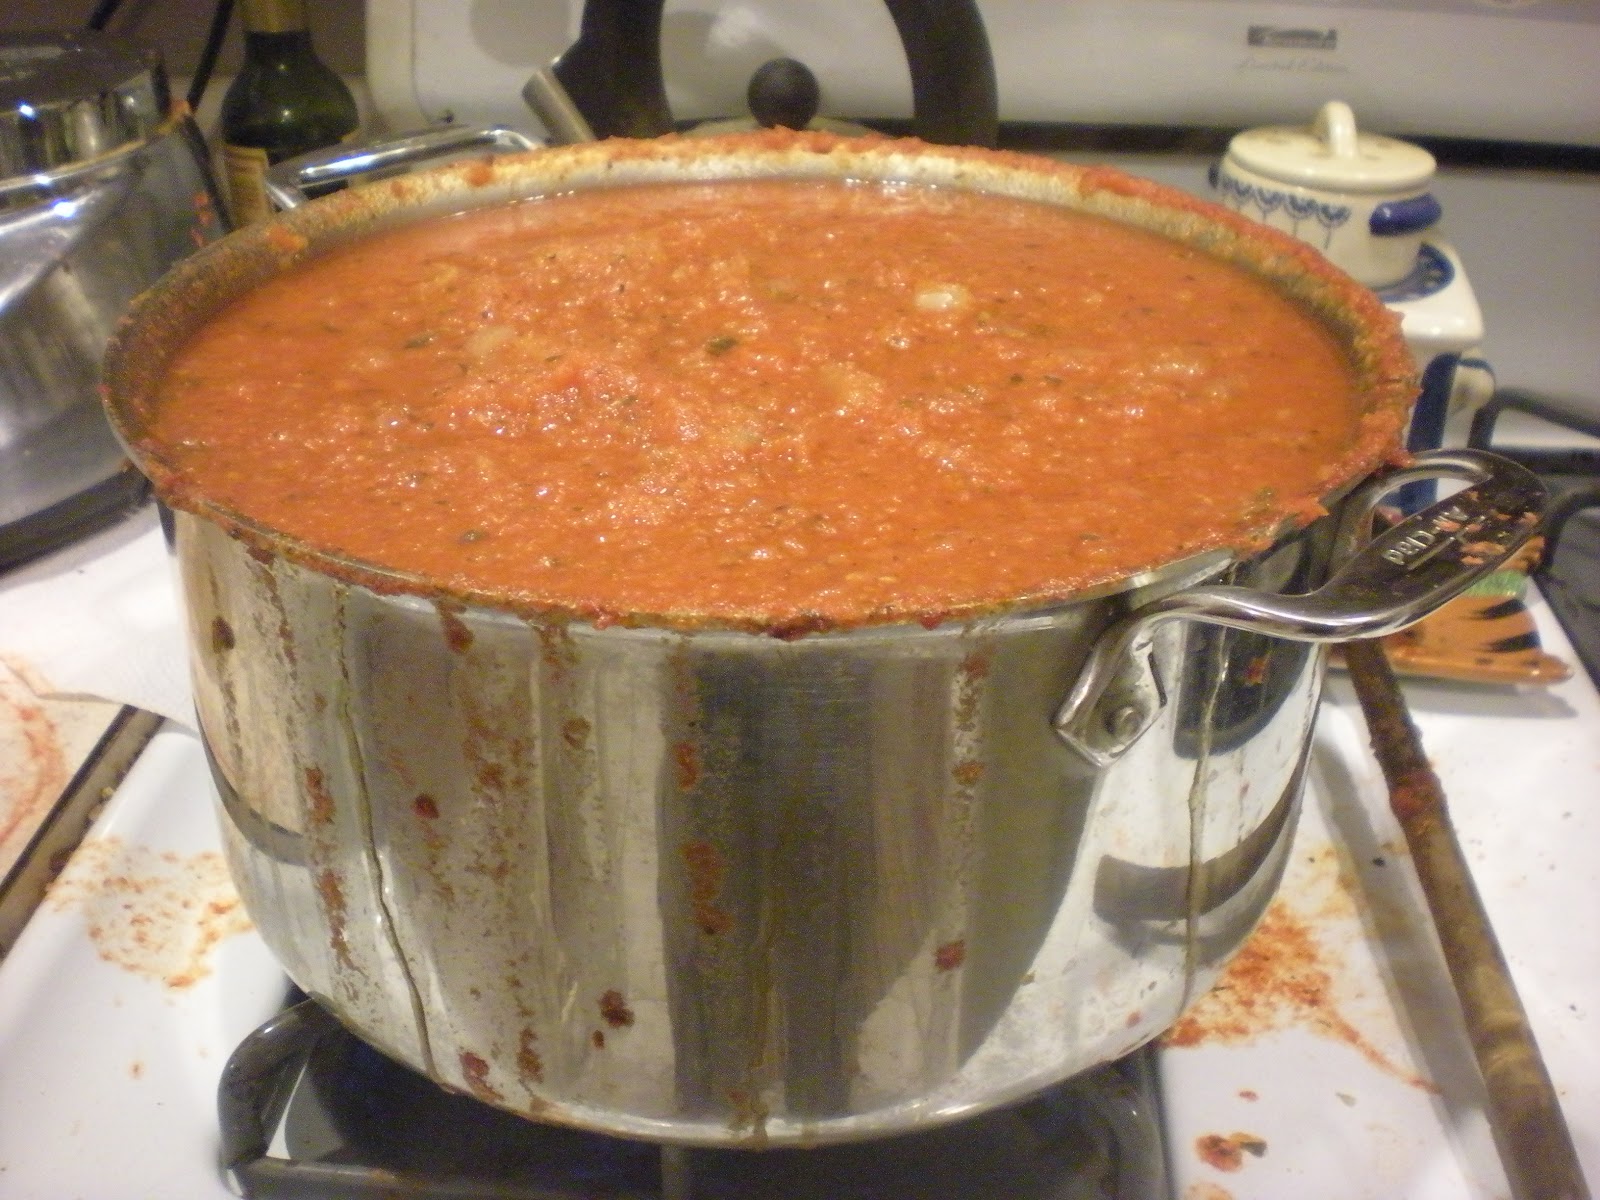
In the end, we canned four quarts and froze three quarts. We used the same recipe that we used last year, except that instead of guallijo peppers, we used chipotles and dried super hots. And again, we sliced them into rounds versus into spears.

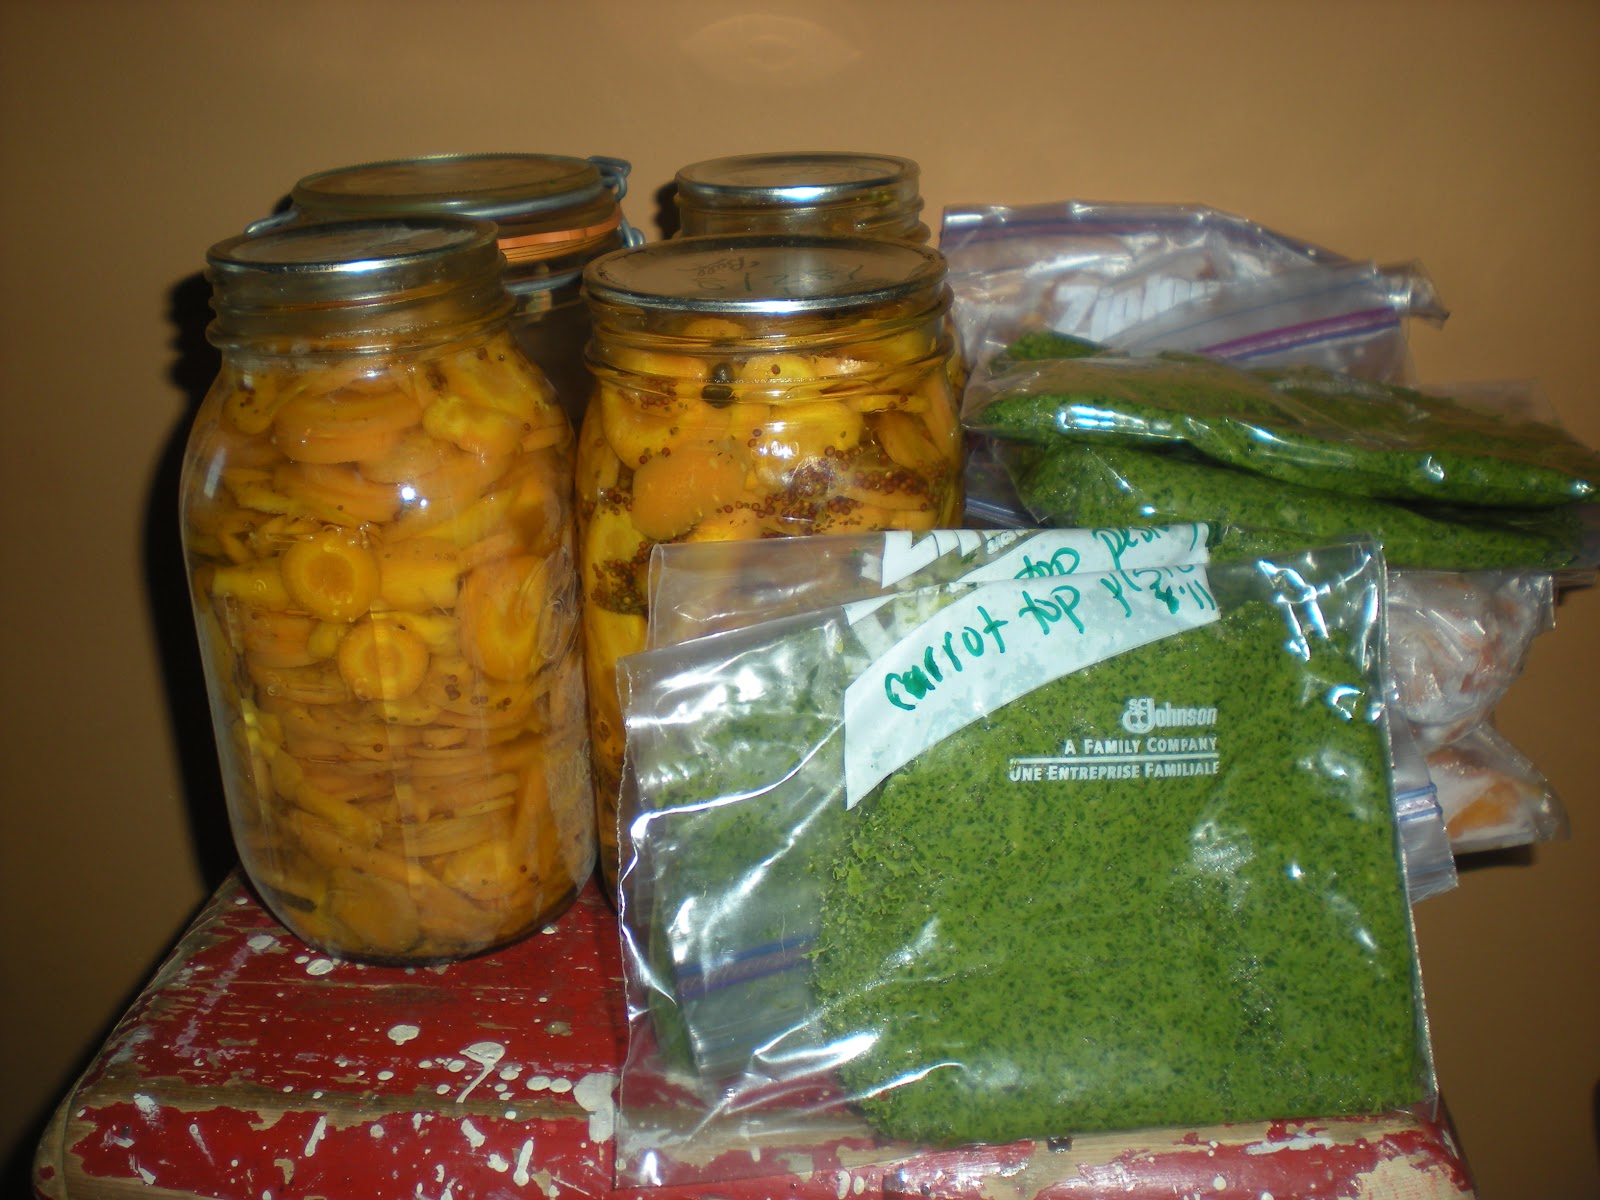
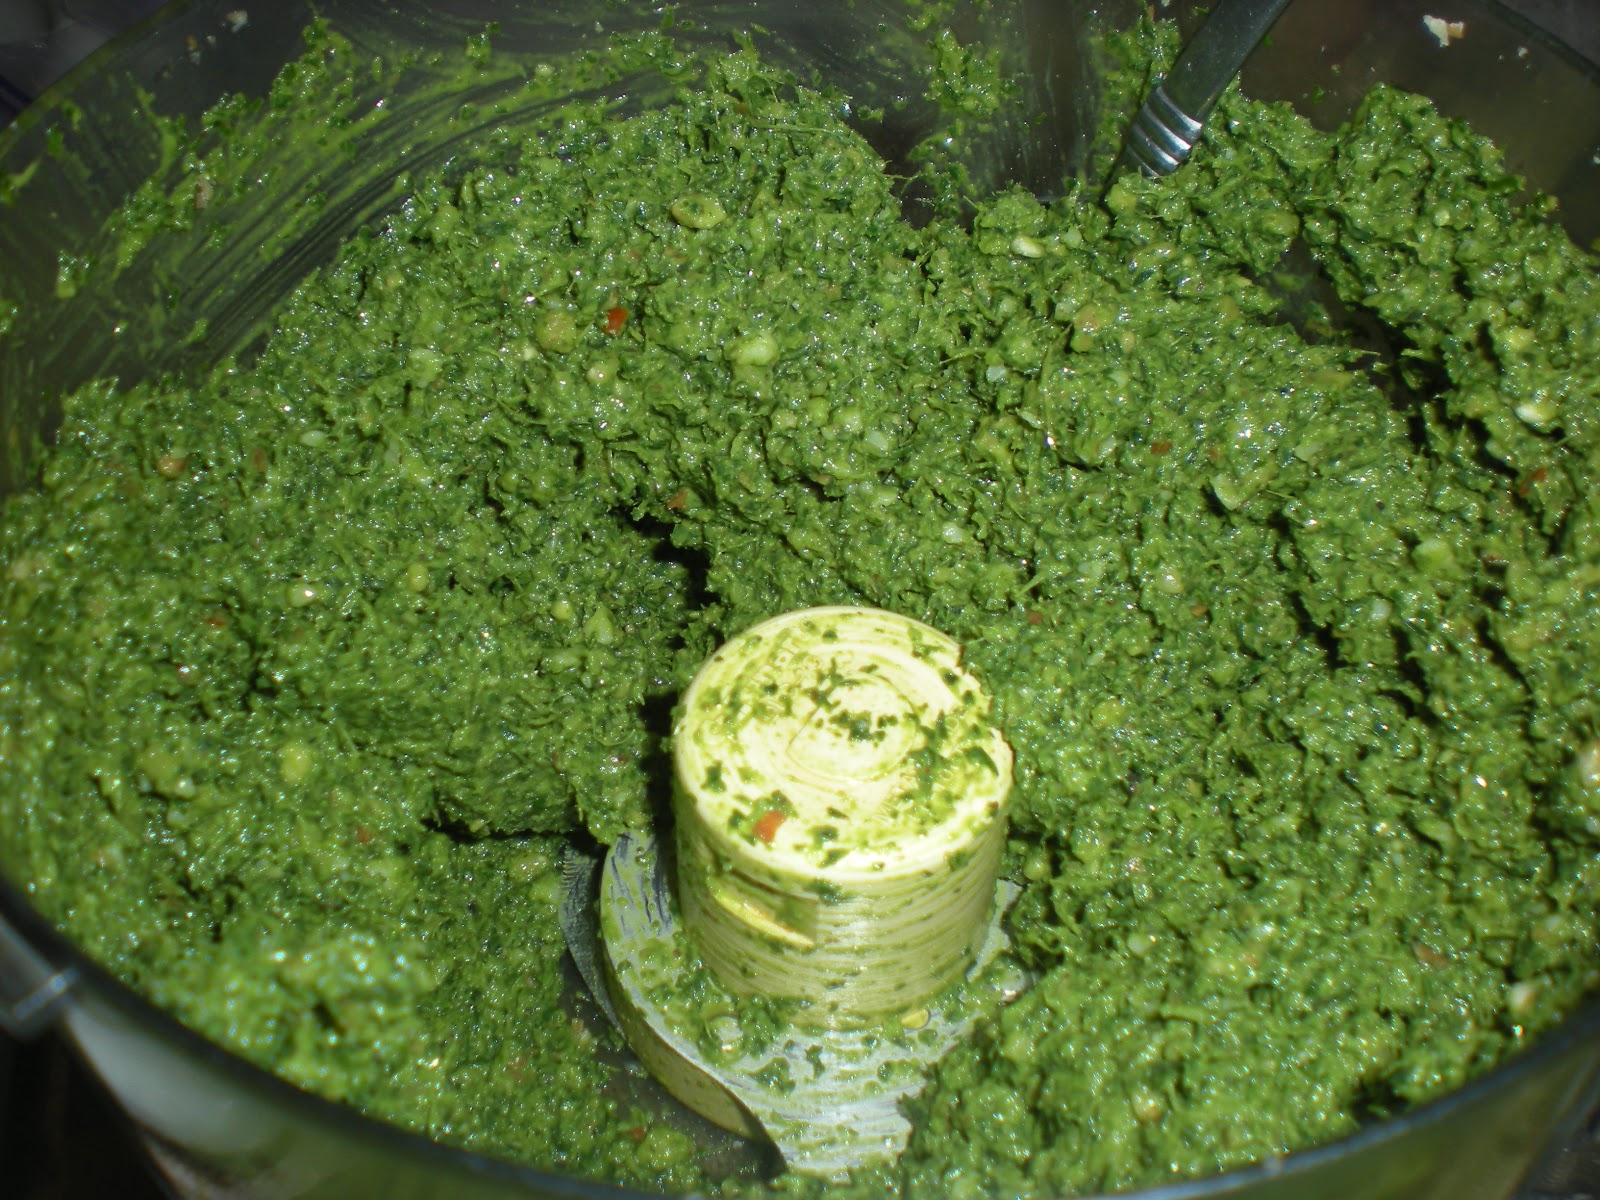
 We also froze four bags (2/3 cup each) of carrot-top pesto. Apparently, carrot tops have a ton of Vitamin K and chlorophyll~ much more than carrots themselves. People drink carrot top tea (sweetened with honey) as a way to quickly get all the nutrients. We thought about drying ours for tea, but decided we’d probably be more likely to eat them up if they were on pizza ~ hence, carrot top pesto.

Use all in varying amounts to your taste (and freeze for the winter, if you’d like!):
Carrot tops (chopped)
garlic
walnuts or pine nuts
Parmesan cheese
salt and pepper
honey
olive oil

Put in a food processor and mix to desired consistency. It’s that simple.

Livin’ in the Kitch’n

The end of August=bustle, bustle, bustle. Of course, the garden is at its peak right when work is at its most stressful time, right?  Luckily for me, I feel comfortable and happy, alongside my cooking partner/husband in a hot, steamy kitchen with loads of bubbling pots, a whistling water canner, the smell of vinegar and vegetables, and pets running rampant.

Last Saturday, we made pizza sauce. We loved the recipe we used from Barbara Kingsolver’s Animal, Vegetable, Miracle so much last year that we used it again this year. We cooked down 25 lbs. of Roma tomatoes and ended up with 10 pints of pizza sauce. Our only change to last year’s process is that we used a bit less cinnamon, and we cooked it down a bit more, so we ended up with less pints, but thicker sauce.

Also, we processed  25 lbs. of Romas into 8 quarts of canned diced tomatoes. These are spectacular to have in the pantry for everything from spaghetti to soups to pizzas in the fall and winter. Last year’s lasted us through this May. We’ll have to can more to make that happen again this year. 

And, we have more cabbage fermenting right now. This time, the crock is full! I think we’ll be kraut-ready this fall and winter. Bring on the Ruebens and Ritz crackers!

Plus, the freezer is receiving the fruits of our labor. This week, I froze carrots, celery, and green peppers.

Tomorrow is beet day!  Stay tuned…

Striped Cavern Tomatoes: The Perfect Stuffers

 Ever heard of a striped cavern tomato? If you haven’t had one, I advise you to add a pack of seeds to your idealized 2012 garden now! These , in fact,are  the perfect stuffing tomato. Plus, they will keep in  your fridge for up to 4 weeks after picking.

The texture and shape of a striped cavern are reminiscent of a bell pepper. The inside is nearly hollow with very few seeds, and the outside walls are sturdy. We grow 1-2 plants a year – the plants are consistent producers, so 1-2 provide/s us with plenty of grilling/stuffing opportunities. Any extra we add to our canning pile as they work well for diced tomatoes too.

Last week, we received Butler Farms Feta Cheese in Sunflower Oil in our CSA Cheese Share. Honestly, this cheese is beyond delicious. The sunflower oil adds an indescribable flavor. Usually, I simply put the tub of cheese with its oils and herbs over a salad, but this time, I combined it with freshly cut Swiss chard and stuffed spoonfuls into our striped caverns. We got the charcoal grill ready and had a glass (or two!) of chardonnay while we waited.

The result was amazing. The tomatoes’ walls held the cheese so well that we used steak knives to cut into them. I can hardly wait until this harmony of flavors is available again!

Wild Fermentation: Sauerkraut and Sour Pickles

As of August 8th, five quarts of sauerkraut have been residing in our fridge.That makes us so happy! Did you know that members of the Brassicaceae family like cabbage, brussel sprouts, and kale are cancer-fighting? Further, a study in Finland found that fermented cabbage may be even better at warding off cancer. We decided against process-canning the sauerkraut because in processing, many of the beneficial live bacteria are killed, and we’re planning to regularly eat sauerkraut for pleasure and for health benefits, so the jars won’t have to time to go bad.

While we wait for the next round of cabbage to be ready, we’re utilizing the crock to make sour pickles. Just like I mentioned that I had nostalgia when it comes to sauerkraut, we’ve found pickles create that feeling in many people we know. When we mentioned that we had a crock, Andy’s dad recalled that as a child he often ate crispy pickles straight from the crock. He explained that the cucumbers were placed with grape leaves whose tannins held the crispiness. Shortly after that conversation, I told my parents what Andy’s parents had said. My dad’s face lit up, and he said he had the same pickle experience growing up on the family farm with his parents. So, we decided to consult one of the Backyard Market Bibles ~ our copy of Wild Fermentation. Sure enough, in both the book and on the website, we found explicit directions for “Sour Pickles.”

Check out the Wild Fermentation book or website for the specifics or here are our easy directions:
 Ingredients:
3-4 heads of garlic
2 or more hot peppers
handful of grape leaves
pinch of peppercorns
3 to 4 flowering heads of dill
3-4 pounds of small- to medium-sized cucumbers
1/2 gallon of water
6 Tbs of salt

Equipment:
crock
plate
weight (we used a gallon of vinegar as a weight)
towel

1. The bottom of the crock will contain all of the grape leaves, garlic, peppercorns, pepper, and dill. So, put desired amount of each in.

2. Then, add cucumbers.

3. Mix salt and water together, making sure the salt dissolves. Pour onto the cucumber mixture.
4. Make sure the brine covers the cucumbers. If not, add more. General rule of thumb is 1 Tbs. of salt per cup of water.
5. Place the plate on top of the pickles. Put the weight on top of the plate. Cover with a towel.

6. Check daily. Depending on temperature, pickles are ready in 1-4 weeks. We started tasting ours when the color faded. We’ve been enjoying them ever since.


Today, we noticed our brine has started going cloudy. That means, it’s time to put them into sterile jars.

So…

7. Sterilize jars.
8. Drain pickles, reserving the brine.
9. Boil the brine. Let it cool.
10. In the jars, put fresh spices and the pickles.
11. Pour the cooled brine over the pickles.

12. Refrigerate.

They should keep for a few months. With all this live food in our fridge, we’re going to need to get a new one soon to make room for everything else!

When the Parents are Away, the Kids (Hens) Will Lay

We spent the weekend with family at a cabin which sits by a pristine lake. When we arrived home this afternoon, we found two beautiful brown surprises. Sadie, our barred rock, 5-month-old hen laid her first two eggs!


Sadie, today’s star!

Right now, her eggs are as small as Janis’ eggs. Janis is our Polish bantam. We anticipate that the size of Sadie’s eggs will bypass Janis’ by the end of the month.

In order: Janis’, Sadie’s, Sadie’s, Spinderella’s, Spinderella’s

 In other news, the family of bunnies living by our raised beds are going to town on our tomatoes. We’re all for sharing and happy co-existence …but, come on! The tomatoes!?!?!  A fence is going up tomorrow.

In the meantime, the chickens are happily reaping the benefits of those pesky rabbits.

The chickens enjoying the aftermath of the rabbits’ feast.
Rocky crowing in delight. 

Quintessentiallly Summer: Grilled Veggie Sandwiches

Isn’t it mind-boggling how fast summer flies?  I am a warm/hot-weather girl. About 98% of my hobbies require weather that involves no snow, so as the calendar creeps back towards winter, I begin having almost palpable anxiety. Every year, right around August 1st, it seems I panic ~ wanting every day and night to be quintessentially summer. 

Well, two days ago, the stress set in. I realized I’d be turning another year older in a few weeks (eeks!), school would be in full swing – meaning my “free weekend time” would again consist of grading papers, and the weather would take a nasty (in my humble opinion) turn towards the bitter cold. I guess time gives us perspective. Perhaps if the weather were beautiful all of the time, I would take it for granted and not give each and every day the attention it deserves.

So, with all of this in mind, on Friday evening, we had a lovely, perfectly summer experience. We put a blanket down in a shady part of the yard, got Franklin the puppy settled, and snacked on cherries, veggies and humus, and melon…and, of course, sipped on wine. I read mindless magazines, and Andy took a nap. Then, we fired up the grill to make veggie sandwiches with cream cheese. This meal was an attempt at recreating my absolute favorite sandwich in Madison, the West of the Andes sandwich (don’t forget to ask for cream cheese!) at The Weary Traveler.

What’s great about this type of meal (if you’re not going for absolute recreations) is that WHATEVER might be in season at the time works.

We grilled carrots and beats and topped them with fresh arugula, tomatoes,avocado, and cream cheese and squashed it all in the middle of a hearty burger bun for this night’s version, but later in the year, perhaps it’ll be grilled winter squash and beets with fresh spinach and blue cheese. Who knows? The fridge and the season will be the deciding factors.

On the side, we served grilled baby bok choy. Delicious.

Despite my all-things-good-end-with-summer fear, I do look forward to the tastes of each season. Fall  brings veggie chili. Winter brings black bean soup. I can get excited for those. I just need reminders! …until cold temps, another birthday and another school year creep in though, I’m going to try and make each day quintessentially summer.

Mouth-watering kraut: step one

Franklin (and the chickens) wanted to eat all our cabbage!

Is it odd that I have a head-full of memories associated with sauerkraut of all things?  Whether or not it’s strange, I get nostalgic for this nearly calorie-less, antioxidant-packed food. As a child, I absolutely loved sauerkraut-and-sausage night. My freshmen-year college roommate and I bought cans of Frank’s kraut to eat with Ritz crackers. It was nearly guilt free. Plus, it was salty and cheap. Our floor mates didn’t appreciate the smell….but I recall many “deep” conversations (mostly about boys) occurring over a package of buttery crackers and a tin can of fermented cabbage. And, I remember wanting so badly to have salty, “real” sauerkraut on my travels in Germany to find (to my disappointment) extra spices in the mix. Apparently, my perception of “real” is the Americanized version?!

My tin-can sauerkraut was divine and beyond satisfactory until Mom and Dad brought home a homemade jar from their friends’ house. This duo canned a cupboard full of sauerkraut from their garden every year. When we were fortunate enough to obtain a magical Ball-jar full, I couldn’t keep my fingers out. I paced back and forth from the living room to the kitchen continuously on several occasions to sneak a finger full.I found a near substitute in Bubbie’s Sauerkraut, but I’ve nevertheless longed for the homemade-by-someone-I-know kind.  Hence, I was more than excited when we decided to finally buy a crock to make fermented foods. Today, we harvested three heads of our cabbage. We shredded those three along with two that we had saved from our CSA boxes.

We washed all five heads, cut out the cores, shredded the remaining cabbage, and got the crock ready.

Then, we put roughly three  handfuls of cabbage in the crock, added about a teaspoon of pickling salt over the top, and then repeated the process until all of the cabbage was inside the crock.

Salt/cabbage mix

 Next, we used a plate to cover and weigh down the cabbage and salt mixture. Then, we put a heavy, full glass jar on top of the plate and covered that with a damp towel.

Waiting …

We’ll be keeping an eye on this for a few weeks, I guess. Then, hopefully, everything will meld together the way it’s supposed to, and we’ll be processing quarts of kraut.

My mouth is honestly watering just thinking about it.

Garlic 2011

We harvested 45 heads of antioxidant goodness today. These were planted back on October 24. For the garden how-tos and health information, check out that entry.
Seems that we’re about 2 weeks behind in terms of harvesting just about everything this year, garlic included. The spring was so randomly windy and cold.
Anyway, what to do with this favorite herb of ours? Pickle? Roast and freeze? Dehydrate?  Do you have any favorite ways to keep loads of garlic well into the fall/winter? Please share.

Heat Wave: shade for the chickens and "Spearjitos" with raspberries for the humans

Wisconsin is under an “excessive heat warning” for the better part of this week. I like the heat, the sweat, the lethargy I feel when it the heat index is +100. My chickens, on the other hand, are not fans. The poor ladies and their gentleman have serious needs during the dog days of summer. Like dogs, chickens don’t sweat, so they cool themselves off by panting; their mouths were agape today, and their eyes seemed to be pleading with us.

We are by no means experts on this topic, so if you have more suggestions, please share. However, we monitored our flock all day, and we took care of them by doing the following:

  • We filled their water containers with ice and water and updated with ice throughout the day.
  • We gave them extra dishes of water.
  • We fed them frozen “treats.” We simply had put a few pieces of fresh fruit in the freezer early in the morning, and we also took out some frozen veggie scraps that we had been saving for stock. As the treats thaw, they get soft, and the chickens are delighted to eat them.
  • We provided them with shade. The vines and trees we planted in their run are now providing some, but in prior years, we’d put up a tarp on parts of their run to provide a bit.
  • We sprayed their run and their coop with cool water. Our chickens don’t seem to really enjoy this process when it’s happening, but they get over it quickly as they realize they’re not quite as hot.
  • We took them out for a few hours into a much more shaded area of our lawn. This seemed to actually be the pivotal moment for them today as they eventually settled down to rest in some random spots of sand.

The chickens cannot be left to fend for themselves on days like these. Depending on their breeds, it is dangerous to leave them to their own devices. We have Easter Eggers and Barred Rocks, which are both heavily feathered birds, suitable for winter climates such as ours. In the midst of a seven-day heat wave, however, all their hardiness is a call to action for us. Here are some pics from our Sunday afternoon spent with them under the trees.

Notice Rocky’s gaping beak: a sure sign your chickens are HOT!
About an hour into the Sunday afternoon respite under the trees, the chickens seem a bit more comfortable.
Even Franklin, the dog (under EXTREME supervision) got to hang with the chickens.
Prudence is contemplating whether to make the trek over to the sand. She ponders that the sand bath idea is a good one indeed.
As for the humans, we picked raspberries and spearmint and made and enjoyed what we’re happily naming “Spearjitos.” This drink is adapted from the commonly known Mojitos, but why spend money on mint when you have spearmint growing in your own backyard, right? Over the last week, we’ve experimented with the best recipe for these, using club soda or tonic water and varying amounts of the other ingredients. By far, last night’s version was the best. To make your own “Spearjitos”, try this:
Ingredients:
white rum
spearmint
limes
tonic water
sugar
Instructions:
1. Inside serving glass, muddle together spearmint (around 1/4 cup per glass) and limes (around 1/4 of a lime per glass) and a Tbs of sugar.
2. Fill glass with ice (on top of muddled mixture).
3. Add two shots (or more!) of white rum.
4. Top off with tonic water. Club soda works too, but the drink isn’t as tasty (in our humble opinions).
5. If you have them, top with fresh berries.
6. SERVE!

..and, of course, the doggie got lots of water and attention all day as did the kitties.

A Dessert Worth Your Time at the Gym

There are many desserts which, for me, don’t equate the time at the gym or on the pavement that will be needed to get rid of the fat and calories consumed. However, the dessert we served up on the Fourth of July was not one of those.

We made (drum roll, please….) Homemade Strawberry Ice Cream and Homemade Lemon Thyme Ice Cream served over Batch Bakehouse’s Lemon Pound Cake (grilled), topped with our freshly made mulberry sauce. It was as good as it sounds.

So…the ice cream. Pretty straightforward. If you’ve been following our ice cream adventures, you know we consistently use the same custard recipe and then add the fruit/flavor once the custard is cool. The lemon thyme recipe is linked here, and the strawberry ice cream recipe is as follows:

Ingredients:
 6 cups of hulled strawberries
1.5 cups of sugar
1.5 cups of half and half
1.5 cups of heavy cream
4 egg yolks

Instructions:
1. Hull and chop the strawberries. Mix with 1 cup of sugar. Let this sit for at least 4 hours (preferably overnight).
2. Whisk egg yolks with the remaining half cup of sugar.
3. Warm the half and half in a saucepan, stirring constantly so not to burn. When the half and half starts to foam, remove from the heat. Slowly pour this into the yolk mixture, whisking constantly as you pour so that  you don’t cook the eggs.
4. Once combined, put egg mixture back into saucepan. Warm over low-medium heat, stirring, until the mixture coats the back of the spoon.
5. Remove from heat. Stir in the cream.
6. Cover and cool overnight.
7. Remove half of the strawberries with a slotted spoon. Put into a separate bowl and save for later use.
8. Mash the other half of the strawberries to form a syrupy sauce.
9. Mix syrupy sauce with custard. Use ice cream maker as instructed.
10. Once ice cream is formed, spoon into a freezer-safe receptacle.
11. Mix in the reserved strawberries and freeze until ready to eat!

Mulberry Sauce (recipe makes about 1.5 pints)

Ingredients:
4 cups mulberries
3/4 cup of sugar
1 Tbs. lemon juice
1/2 cup of water
1 Tbs. cornstarch

Instructions:
1. In a saucepan, pulverize mulberries, creating a saucy consistency.
2. Stir cornstarch into water in separate bowl.
3. Combine cornstarch-water mixture, lemon juice, and sugar into the pulverized mulberries.
4. Bring to a boil. Remove from heat and cool.
5. Strain sauce to remove seeds. Store in container. Serve cooled over ice cream (or pancakes or french toast, etc., etc.)

Then, to assemble this massively delectable delight:
1. Cut pound cake into 1″ thick slices. Brush with butter and grill over hot fire for 2 minutes each side.
2. Put pound cake slices into serving bowls. Top with ice cream(s). Finish with mulberry sauce.

YUM! YUM! YUM! YUM! YUM! YUM! …and I’ll be with you in spirit at the gym tomorrow.